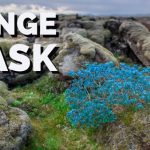
Presets are great for a number of reasons. Easy to get a look, Easy to preview using the Navigator, and repeatable would be high on the list. It’s wonderful to get a look and save it as a preset. But sometimes, you apply that to another image and.. Ugh.. it’s terrible. Why?
Well if you did a lot of work to get to that point, the base settings may be too much for an ordinary image.
For presets to be universally good, there are some basic things we need to understand. First off, presets for Raw and JPEG/TIFF that use all the settings need to be different. Lightroom applies +50 Brightness and +25 Contrast to Raw files by default, while JPEG/TIFF is left at 0. This makes a big difference in the look, requiring different presets. There is another option of course, and one that I think is the universal way to approach preset creation.
For every look you want to create repeatably, start work on an image with the exposure and colour corrected. When you want to save the preset, only save the the settings that create the look, but not the settings that fix the exposure and colour. For example, let’s say I add +0.5 stops to my exposure and then take 500 degress off my temperature to correct an image. I then do some split toning and add a tone curve to create a cross processed look. If I then save this as a preset with all settings on, and then apply it to an image that is corrected take, then the look will be brighter and cooler than wanted. So instead I save the preset with Split Toning and Tone Curve only selected. This means the look can be created independently of the original images exposure issues.
For ease in finding the correct exposure, make a folder of presets that have different exposure levels in 1/3 stop increments. When you save these presets, make sure only Exposure is ticked in the New Develop Preset box. This way you can simply hover over the exposure presets in the left panel and see which one looks correct for the image via the preview in the Navigator.

Only choose the necessary setting when creating the preset
This can also be done for White Balance Temperature, allowing you to get a rough White Balance visually (assuming you haven’t used a colour chart or gray card).
A final option is to have a series of contrast curves saved with only Tone Curve selected when saving. This method of building up looks means you can quickly find a combination of presets to give you a final look for your image in Lightroom.