
While I provide a lot of free tips, tutorials, and even galleries to users, sometimes I do a little that requires some return on my time.
To aid users in selecting the right look for their landscape images, I’ve created a set of over 70 Graduated Filter presets to get you started with making creative choices for your images. Covering both landscape and portrait orienations, as well as hard and soft line filters, these filters come in 3 standard colours: ND (Grey), Blue and Tobacco. As is also standard, they come in strengths of 1 stop (0.3), 2 stops (0.6) and 3 stops (0.9). It was a bit of work to create this, but I’m not charging a whole lot for them, just €5.00 (about $7.75). Obviously you can tweak the settings once applied. In fact I positively encourage it!
Why should you pay for these, when you could create them yourself? Well the fact that it takes a bunch of time to put them together is the best reason. Probably more than €5 of your time. Also by running down through the Presets panel on the left of Develop, you can preview them quickly to see how they look with your image. Much quicker than mucking around with sliders.
You can see some of the presets in sample form here: Download Sample Grads
To install these presets, drop the Sample Grads folder into:
User/Library/Application Support/Adobe/Lightroom/Develop Presets on OS X,
C:Documents and SettingsUserApplication DataAdobeLightroomDevelop Presets on XP-Note that Application Data is a hidden folder,
C:UsersUserAppDataRoamingAdobeLightroomDevelop Presets on Vista,
where User is your login name.
Or you can click on Preferences>Presets>Show Lightroom Presets Folders to open this folder in Finder/Explorer. Then open the Develop Presets folder from there.
The full version folder contains 4 Sub folders, place these folders in the Develop Preset location mentioned above.
You can also Right click on a preset or folder and import them from within Develop, which is fine for a small amount of presets, but for folders, manually placing them and restarting Lightroom is quicker.
The 4 folders are:
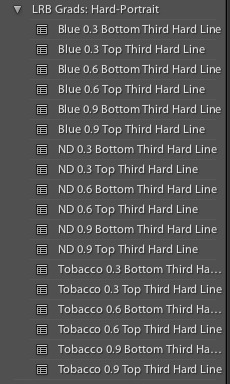
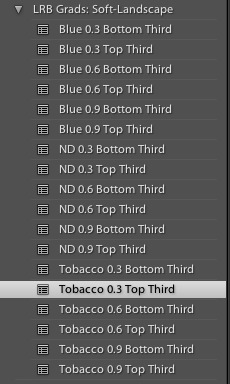
Grads: Hard-Landscape
Grads: Hard-Portrait
Grads: Soft-Landscape
Grads: Soft-Portrait
Hard Grads have a tight transition, which Soft Grads user a wider transition. Landscape and Portrait Grads need to be separate as they don’t rotate. The 3 colours (ND, Blue and Tobacco) come in 1, 2, and 3 stops varieties, equivalent to 0.3, 0.6 and 0.9 in standard filter terminology. Also as most Landscape photographers use the Rule of Thirds to compose, each type is set on the bottom and top third, allowing you to choose the nearest one quickly. To change the filter, click on the pin to select it (Press M to activate Grad Filter in Develop, if it’s not open). Drag the pin to move the centre of the grad, and the outside lines to make it softer or harder. Finally click the colour chip to change the tint. The Blue and Tobacco colours I’ve chosen are simply ones I like. You may prefer a redder Tobacco, or different blue. Actually then ones I have look similar to the Cokin set I own, so I was trying to get close to them.
To Download, add them to the cart. Payment is Paypal via E-junkie, but can also take Credit Card. Once Paypal sends notification, an email will be sent with a download code.
Windows user that experience security issues related to downloaded Zip files should try an alternate decompressor such as 7-Zip.
Update: On the advice of Richard Earney, I’ve rezipped with BetterZip to remove Mac related components. Please let me know it you’re still experiencing trouble after redownloading. Also rather than clicking on the link in the email, copy and paste it into your web browser. This works fine for me using XP under boot camp.
Update #2: I’ve found one of the presets had an incorrect value which has been fixed and the packages reloaded. Please download again. Apologies. I did check them before I posted, but somehow missed one.
Update #3: A few people commented the Portrait grads were upside down. Well, they’re not.. They just shoot upside down! Seriously though you should turn the camera so you shoot with the shutter button up. It makes the camera more stable. Anyway for those that shoot upside-down, I added another 36 presets, duplicating the normal ones, but upside down. In fact they probably got more love!
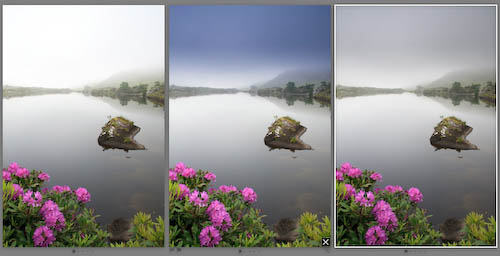
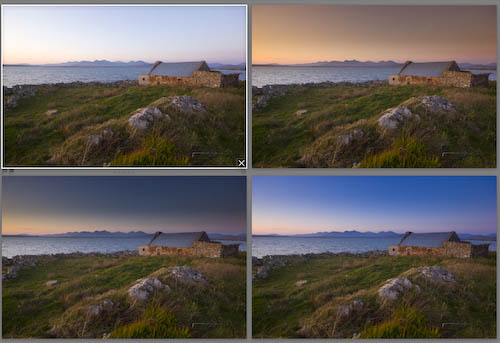
A look at the sets:
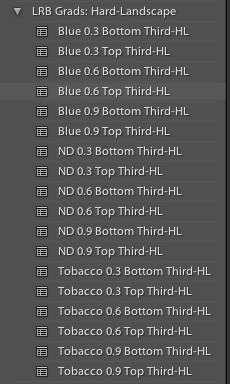
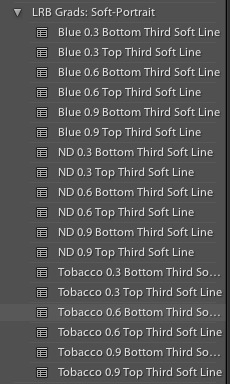
Here’s roughly how they look, first the hard set, then the soft.


There are 2 vertical and one horizontal set.
For whatever reason, Lightroom applies the presets to the pre rotated file. Because people hold the camera different ways these 3 sets are necessary. Actually a 4 set for upside is technically needed, but as most of use don’t shoot between out legs, it’s not strictly necessary.
What camera are you using? Or are these already rotated files?
I am quite familiar with using Graduated filters; and since using them takes time, I thought your presets might worthwhile; so far, I’m quite disappointed and readily admit I might be misunderstanding something. So far, I have not been able to find a way to adjust them vertically; some come in horizontally when the should be vertical.
Happy New Year – had to get the pack as soon as I foun dit – great compilation. Maybe worth to mention – if you enable ie. Camera Specific or ISO specific profiles, the Settings are not in the user/library but in the same folder as the lightroom catalogue file (for Mac OS X).
If you previewing the on a portrait oriented image they will look like that. You need to look at them on a landscape oriented image.
these are great, but all but the soft landscape are vertical rather than horizontal (that is, they graduate from left to right or right to left). Can this be fixed? Wendy
Well, this is great stuff. Have been looking for the ways to use a ‘digital’ ND filter, this is the answer.
Jan, 4 comments weren’t necessary, so I’m only publishing one. You obviously missed the message that comments are moderated each time you posted.
Basic has nothing to do with the grad filter which appears in the Tool Strip below the histogram. Presets don’t open it. To open it click on the icon or use the shortcut M. Click the pin to activate.
I dont know if you received my previous comments. Jan
Hi Sean,
I boought your set of presets. According your instructions put them in LR. I face the following problem: I can see the presets work in preview,on the image,and the histogram only the sliders don’t move and I cannot adjust them.Other presets installed the sliders move in basic. I have windows vista ultimate and downloaded the update to LR 2.1. Please advice Regards Jan
No, they’re just for different photo orientations.
Lightroom doesn’t have a one size fits all preset, so you need at least 3 types: landscape, portrait up and portrait down. (technically you need one for upside landscapes too, but that’s pretty rare).
I imported trial into light room and the Grad#1 filter is showing correctly at top of my photo but when I try #2 & 3 the grad filter is on the right side going up and down virtically. Did I do something wrong?
Just used these. They are fantastic…but you need another couple of sets: full screen filters for blue, tobacco and ND at the .3, .6 and .9 levels.
I would have used them last night on an image shot for a local chamber of commerce.
I saw the mail between getting in from a daytrip and going to work, didn’t get a proper look yet John.
Sean, I hope my email got to you ok.
John
Sure. Why not..
Use your download email to reply, that way I have a record of your address in an easy to find way!