Announced at 5am local time for me, Adobe launched the beta preview of Lightroom 2. I opted to sleep this one out. Any Lightroom 1 owner can download the time limited preview to try out and comment on the new features (Expiry is Aug 31st). While there are tonnes of new features, UI changes and enhancements, the real biggie is the new Retouch Pane (shortcut ‘K’). This pane allows for local corrections. While this does allow for superb Dodge and Burn, it is far more than a Dodge and Burn tool. The 5 main things that can be changed in each correction are Exposure, Brightness, Clarity, Saturation and Tint. While the initial mask is created with one of these settings (either postive or negative), you can edit the changes to include all of them. That means you can burn in an area and then tint and desaturate it for example.

The Retouch brush has a number of options: Brush Size, Feather Size and Flow. Size is controlled by the shortcut keys [ and ]. During this phase of the Beta the shortcut key for feather is Alt [ and ] (Option on Mac). This should change to Shift [ and ] to match with Photoshop’s Hardness shortcut. Feather is the opposite of hardness so the shortcut is kinda the opposite to Hardness, so it works in the opposite direction, ie increasing Feather reduces the hardness of the brush. Opacity change the strength of the brush.
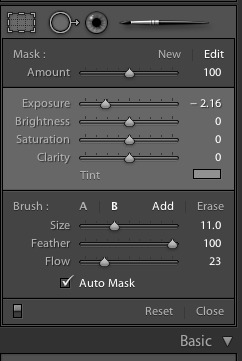
Once you’ve create a mask, a button (or pin if you like) will be created. Hovering over the pin will show the mask you’ve created. Clicking it, or clicking the Edit control in the Pane will allow you to make changes to the correction. You can also change the amount of the correction (like Fade Filter in Photoshop, or Layer Opacity). So that’s a very quick look at Retouch.
I have to mention that these changes are stored in the Metadata and do not require conversion to another file format like Apertures Dodge and Burn tool. That tool creates a new file and the changes are made to that file. Not the Original. In case anyone is being fooled, you can do this with Edit in Photoshop, except that you have the full power of Photoshop available to you. If you want to keep the adjustments with the original file: you need to use Lightroom. Yes, I’m being a fanboy, but here I have a good reason.
![]() Other features include: Multi Monitor support, with the new Live Loupe. We can finally put Lightroom on more than one screen, without stretching. The new live loupe feature is very cool. Turn it on and then run along the Filmstrip or Grid to see a Loupe sized preview of the image. If you zoom in and move around the thumbnail, you move around the image. This is not like Aperture, but shows the full screen rather than a small portion of the image. You can also use this while in Loupe View, to show a zoomed in version.
Other features include: Multi Monitor support, with the new Live Loupe. We can finally put Lightroom on more than one screen, without stretching. The new live loupe feature is very cool. Turn it on and then run along the Filmstrip or Grid to see a Loupe sized preview of the image. If you zoom in and move around the thumbnail, you move around the image. This is not like Aperture, but shows the full screen rather than a small portion of the image. You can also use this while in Loupe View, to show a zoomed in version.
Smart Collections are in. As are Module based Collections. If you save a collection in Slideshow, Print or Web, Lightroom remembers all the settings for the Module and will open the module when you double click on the collection. So you can save your slideshows!
The Metadata Browser is gone, replaced by the new Filter Bar at the top. You can filter down through a mass of keywords and metadata to get exact image matching. The shortcut for this is .
Output Sharpening. Jeff Schewe from Pixel Genius consulted on the creation of this addition to both Print and to Export. A few seem to have missed this for export, but it really rocks. The sharpening has 3 settings Low, Medium and High, and is based on size and resolution of your output. Screen output requires different sharpening to Glossy Paper (or Matte) and this feature correctly handles the change of sharpening per media type. Appropriately, you can select Screen, Glossy and Matte for this.
Print to Jpeg, with selectable profiles, is now available in the Print Module. In Print Job, change the engine from Print to Printer, to Print to JPEG file.

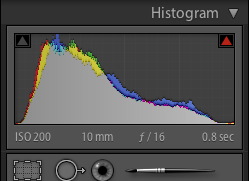
If you looked at Retouch above, I’m sure you’ll have noticed the move of the Red Eye, Crop and Spot Removal tool to under the Histogram. This allows for additional tools and for more controls in the future. The toolbar location was a bit limiting in what could be controlled. Personally I really like it here.
While no Book module has been added, there is a new section in Print: Picture Package. This allows any shape or size of one photo to be placed on a page. So you can finally have 3 6X4 images on on A4 sheet (albeit the same photo!). The image cell is drag-able and can be reshaped and sized to your hearts content.
The Detail Pane has a new preview window along with absorbing Chromatic Aberration. The fundamental thing linking the tools is the need to view at 100% to see the changes.
Lens Corrections has change to Vignettes. Yep that’s a plural. You can now add a Post Crop vignette in addition to a corrective Vignette.
Photoshop support has greatly increased, including the ability to not create a TIFF for every image sent: you can now Open as Smart Object, Merger to HDR, Merge to Panorama, or Open as Layers. Yes! You need 10.0.1 for this to work though. Speaking of Panorama, Lightroom has now increase the Size Limit to 30K pixels, rather than the original 10k Pixels. So anyone shooting 900MP square format photos can now rest easy 😉
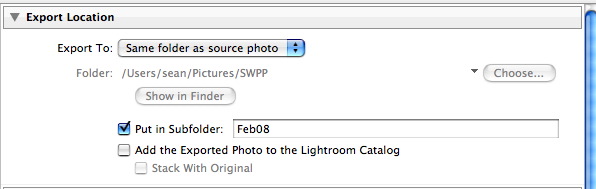
Another cool Export feature is Exporting to Current location with the option of a subfolder. You can also opt to import the Export automatically, as well as stack it with the original. I can see a few people jumping up and down with this one!
There are other changes, such as the simplification of the Library Panels, Suggested Keywords and a new Auto Tone algorithm, but go to the official Lightroom Journal post by Tom Hogarty for more.
Folks, I’m delighted to have gotten this far with it. It’s really a fantastic bit of work from the team, who have been busting their proverbials working on this. They are quite a small team, so congrats are well in order for them getting this out to us as a Public Preview. They could simply have went on and finished without further input, but they’ve opted to get public input on it, so go get it!