

After an initial leak last night while testing the servers, Adobe has officially released Lightroom 1.1 to the expectant public. The free download for all 1.0 customers is available from the Adobe website. Announced over a month ago, with a smattering of the new features appearing in Camera RAW 4.1, users can now finally get to see the results of 4 months work fixing bugs, adding new features and general testing.
The Big Stuff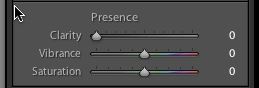 As RAW development is a key area for most users, let’s cover some of the new additions here first. Clarity is a new slider, now coupled with Vibrance and Saturation in the ‘Presence’ section of the Basic Pane. It provides local contrast enhancement in a similar way to using Unsharp Mask with a high radius and low amount. Personally I love it. It really adds ‘Punch’ to an image (to use it’s initial name). Like a lot of settings it can be overdone, but sometimes extreme settings can be used as an effect in themselves.
 Next we have the beefed up sharpening control in the Detail panel. Gone is the single sharpening slider that lacked any control or subtlety. Instead we have 4 controls and some very useful modifiers for these. Amount is obvious, but what may not be obvious is the reason it runs from 0-150. In fact the normal range of sharpening amount is 0-100, but it was felt that some cases may require severe sharpening to salvage images, or as a creative effect. Above 100 this control can do serious harm to your image. (Of course I like that kind of thing).
Following that we have Radius, which runs from 0.5 pixels to 3 pixels. Radius controls how far out from the edge that Amount affects. Bear in mind that these controls are intended for capture sharpening, although there is leeway for more extreme settings if needed.
Detail is appropriately named, as when you move the slider to the right, the detail areas of the image start to become sharpener.
Finally Masking lets you control the area that the sharpening affects, by creating an edge mask based on the slider position. A cool way to see the mask rather than guess where it is, is to hold down the Alt/Option key when moving the slider. The image will go from all white to just the area with strong edges as you move right. This is incredibly useful for preventing sharpening in skies and on skin.
This Alt/Option modifier can also be used with the other 3 sliders. Alt/Option Amount will give a monochrome version of the image to show the sharpening at work. Alt/Option and Radius allow you to see the distance out from the edge that the sharpening is affecting. Finally modifying the Detail slider allows you to see exactly what detail will be brought out as you increase it. It looks a little similar to the High Pass filter in Photoshop.
One key thing to remember is that you must view at 1:1 to see these controls working. In fact there is even a little warning triangle in the Pane that zooms in when you click on it.
While we’re in the the Detail Pane I will mention that Noise Reduction has been improved a lot since version one. It’s still not in the same league as a standalone like Neat Image, but it is good enough for a lot of images. Again this needs to be viewed at 1:1 to see it working.

I’ll just take a little brief run through some other features for this post. The concept of the database as a ‘Library’ has now been changed to ‘Catalogs’. You can export images to a catalog, as well as importing them into another catalog. This is useful for a number of reasons, not least of all you can transfer edits from your laptop to your desktop. While Lightroom now runs larger catalogs much better now, smaller catalogs are faster. This means you can do a catalog for a specific job and do all the selection and deletion from there, before importing into your master catalog. This is great for backup too, because it is possible to burn off standalone catalogs with the images and previews intact. I do this by exporting to an inserted blank disk. As a side note, you need to have at least 200Mb free for Catalog Export.
There are loads of little things that make life easier, such as in Web or Slideshow, you can choose to use either all photos or selected photos to make a gallery/slideshow. Impromptu Slideshow starts from the currently selected image. You can choose to show photos in subitems or not (I know loads will be delighted with that!). DNG conversion can now embed the RAW. Presets can now go into folders to tidy them up. In fact there’s probably over a hundred changes in these small things. I’ll cover a lot of these in another post.
In the meantime I’m sure the download is done, so get cracking on this update!


Hi Chrisoph,
The mixed language version which includes French and German is yet to be released, but should be here soon. This is the same as for the Version 1.0 release.
Hi,
I downloaded LR1.1 and followed the instructons to install. But now my LR -language is english instead of german as I purchased.
How can I change the language back?
Christoph