Lightroom is a pretty diverse program, which is simple to start learning, but contain hidden depths. Here’s some shortcut tricks that use modifier keys to access hidden features.
1. Straighten your Photo: Press ‘R’ to go to the crop mode in Develop. Press the Control key on PC, Command key on Mac. Then click on a point and drag to a second to let Lightroom rotate to make that line straight.

2. Quick Develop. You can access hidden settings in Quick Develop by holding down the Alt Key on PC, or the Option Key on Mac. This will change the Vibrance and Clarity controls into Saturation and Sharpening.
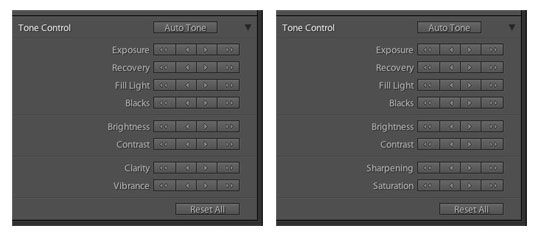
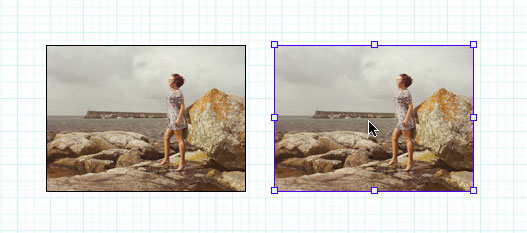
3. Print. In Custom or Print Package, hold down the Alt Key on PC, Option key on Mac, and drag a cell to make a duplicate copy of the cell, image included.
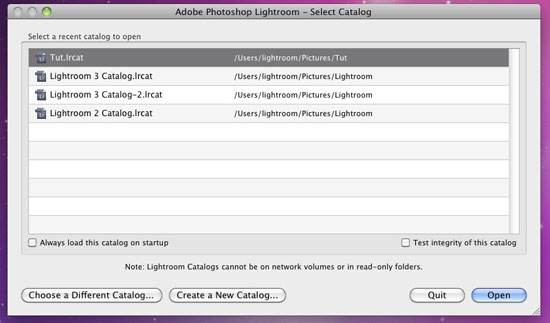
4. Catalogs. Hold down the Control Key on PC, Option key on Mac, when starting Lightroom to bring up the Select Catalog dialog box. From here you can choose between recent Catalogs, pick an alternative, unlisted, Catalog, or even create a new one.
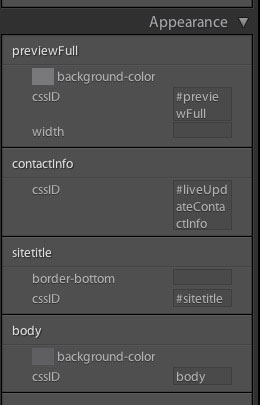
5. Web. In the Web Module, you can cheat to access settings not available to you via the normal UI. Use the shortcut ‘Shift Control Alt /’ on PC, ‘Shift Command Option /’ on Mac, to turn the Appearance panel into a list of internal CSS tag items. To go back to normal, simply use the same shortcut again.
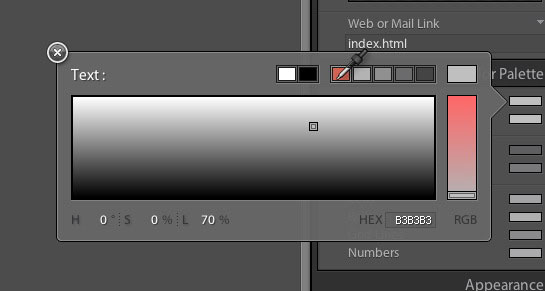
6. Color Picker. When you’re using the Color Picker in Slideshow, Print, or Web, sometimes you’d like to keep consistent colours between the work you’re doing, for example, using your brand colours. Find the colours via the Hex (or click on the word HEX to change to RGB) settings, then Alt/Option click on the swatches to save the colour for reuse elsewhere.
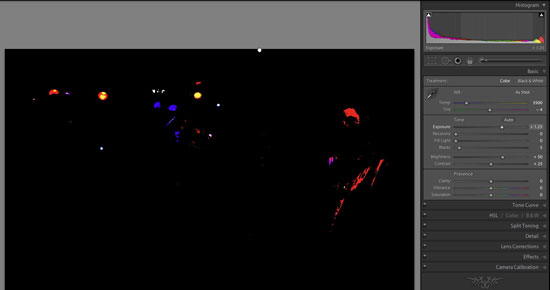
7. Setting your clipping points. Hold down the Alt/Option key and go to the Basic Panel in Develop. Drag Exposure, Blacks and Highlights in turn to see the points that are currently clipping. For example, clicking Exposure with Alt/Option held down will make the central area black. As you drag the slider, you can start to see the areas that are clipping. The colour represents the which channels are clipping, so red means the red channel is clipping etc. Recovery also makes the screen black, whereas Blacks will make the screen white.
8. Reset. Holding down Alt/Option will turn titles into Reset buttons. For example Presence becomes Reset Presence. Clicking this will reset all the Presence sliders.

9. Delete. Delete brings up a Remove/Delete box, or removes from a Collection. What if you want to get rid of it no matter where it is? Here’s a dangerous shortcut to learn. ‘Shift Control Alt Delete’ on PC, ‘Shift Command Option Delete’ on Mac. This is the ‘terminate with extreme predjudice’ command. It even deletes from within a collection. Use with care. Undo does not work with this command.
10. Change Import and Export. Holding down Alt/Option in Library will change the Import to Import Catalog, and Export will change to Export Catalog.






To further tip 8… double-clicking the slider labels will individually reset that slider.
Great stuff. Thanks!
thanks for the tips!
“7. Setting your clipping points.”: Too bad that it’s a clipping warning based on MelissaRGB, so even though you don’t get a clipping warning, you might still get massive clipping is sRGB…
http://www.getcolormanaged.com/color-management/clipwarninglr/
What exactly is the option key in Mac?
The one to the left of the command key. On newer Mac keyboards, it also has ‘alt’ on it.
I am using a Mac, and I cannot get the CSS keystrokes to work for me.
It’s definitely work on Mac Linda-I’m on a Mac.
Shift Command Option /
The first tip – it is taken from Raw Shooter originally.
The crop tool was in Lightroom before Adobe bought Rawshooter. Rawshooter was purchased in May 2006, while the crop and straighten tool were in Beta 2 released 13 Feb 2006, which was also a Mac only release.
Great first tip. I’m hardly what you’d call a power user, but I do a lot of photo straightening and that first tip is going to make things a lot easier.
Great list, Sean! I didn’t know about the CSS trick. Thanks for sharing!
Thanks, I learned some new tricks
Genius tips!! Learnt a couple more there, especially the straigten tool from the keyboard, that will save me some mouse clicking!