The new Camera Profiles are really great for getting a good look quickly. But you want to preview them to see what suits. Well, changing them in Camera Calibration will let you see them, but it’s a bit tedious. The obvious answer is much easier than you might expect: Create a batch of Presets!
Open your image and go to the Camera Calibration tab in Develop. Option/Alt click the tab to switch to Solo mode if you want to see only this tab.
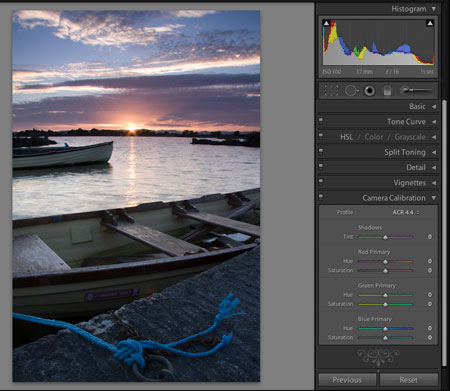
The Camera Calibration tab in Develop. ACR4.4 is the default profile for the 40D
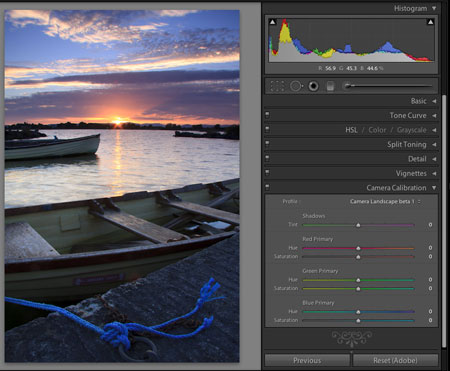
In the Profile section, select a camera profile. Here I’ve selected the Landscape profile.
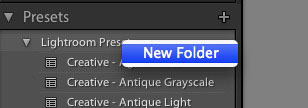
Right click on a presets folder and choose New folder. Name it for the camera. In my case I’ve called it 40D Camera Profiles.
Now use Shift Command N (Shift Control N on PC) to call up the New Preset dialog. Name the Preset to match the Profile name. Select the Preset folder you just created. Click Check None and then Camera Calibration to make sure only the Camera Calibration settings are saved.
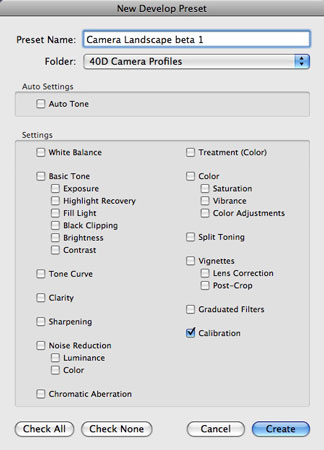
Repeat for each Profile. When done, you will have a folder of Presets to hover over and preview the look in the Navigator panel.
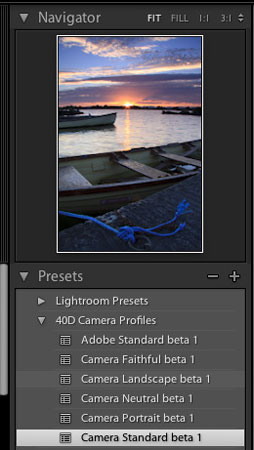
As a treat to fellow 40D owners, you can download the presets I created for this tutorial here. You need the Camera Profiles installed for these to work. Update: These seem to work for any Canon camera. The preset seems to just take the appropriate profile for the camera to preview, which means any Canon camera should be previewable from these presets. I’ll check with Eric Chan on this.
Update 2. I notice that the Camera Standard, Neutral, Portrait and Adobe Standard also work on Nikon Raw files also (D3 and D70 are the Raw’s I have).
Update 3. Here’s a set for Nikon users.




Sean – you are a genius! Thanks a lot for saving me loads of time.
Very handy–just added this myself. Thanks for the tip. Thanks also for all the presets.