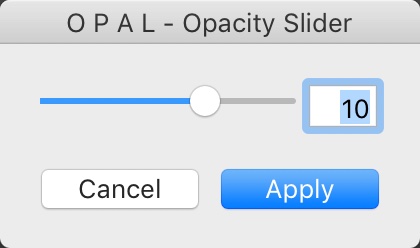
Today we’re looking at a cool little plugin called OPAL that’s just been launched. It allows you to fade or boost presets and settings inside Lightroom. It means you can tweak any Preset you have, as well as whatever settings you’ve made proportionately!

It’s really neat: http://ift.tt/2BDikJH
I really only do affiliate links on stuff I genuinely like. I get offers for these all the time and am selective about what I choose.


Isn’t this the same functionality as the shareware plugin FADER offers already ? https://www.capturemonkey.com/thefader/
Hi Bjoern, yes and no. TheFader requires you to choose a preset in the dialog and fade it from there. OPAL fades all current settings, even ones you’ve applied after applying the Preset. It means you’re not having to unapply a preset and reapply it via TheFader. Also you’re technically supposed to pay a $10 license fee for Capture Monkey plugins (which are awesome). I did cover them for Lightroom Magazine a few months back.
Hi! Nate here (maker of Opal). Just to add on to what Sean said…There are some pretty major flaws with the way the fader is designed that make it not as useful for photographers as Opal.
*Workflow* – The fader takes *forever* to use… you have to go zero out all your settings, then go through file menu to open, then select preset folder, then select presets to apply… it takes forever. With Opal, you can apply any presets you want first, then call up Opal with just one key. So much faster and makes more sense in workflow.
*Preset Compatibility* – The fader is NOT actually compatible with the way most presets are designed these days. If you use VSCO, for instance, the fader doesn’t apply the camera profile. If you use a modular preset system (like X-Chrome or DVLP), it simply won’t work on the fader… if you use a preset that has a custom white balance (like Classic K12), that won’t work either on the fader either… these are pretty common preset scenarios, and they won’t work with the fader. All of those situations work perfectly on Opal.
*Image Quality* – The fader uses linear interpolation for everything, which does fine when you’re reducing a preset strength, but creates some wacky results when making a preset more intense. Opal does a much better job of interpreting what settings to adjust a preset to at higher strength.
*Advanced Editing* – Not shown in video, but with Opal you can make more fine-tune adjustments that only impact certain effects. The effects are grouped in a really useful way, based on how presets are designed. You can learn more about that on this video: https://nate-photographic.wistia.com/medias/5efxvjo5c3
Hope that helps!