Lightroom's Slideshow module is probably the most unloved by the Lightroom team, seeing no love in Lightroom 4, and only the addition of start and ending screen, and duration based on song length (with the removal of playlists). You'd be more than forgiven for looking elsewhere. Only one transition option, no timeline and fixed durations for all slides, it is really primative for 2012.
You could go for a ‘do it all’ service like Animoto, which makes spiffing videos (and indeed I do), or Mac users could take a look at Fotomagico 4 from Boinx, if they wanted far more control. Fotomagico is a fully featured Slideshow maker with Lightroom integration (it also integrates with iPhoto & Aperture). You can also access photos via an internal image browser.
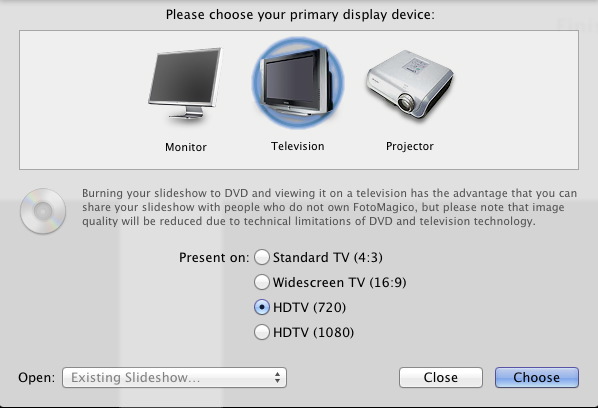
Rather than simply talking through features, I think a practical (albeit basic) review is more in order here. When you start Fotomagico, it first asks what you intend displaying on. It can be a monitor, TV or a projector, and each selection has options. I'm going to run with HDTV 720.
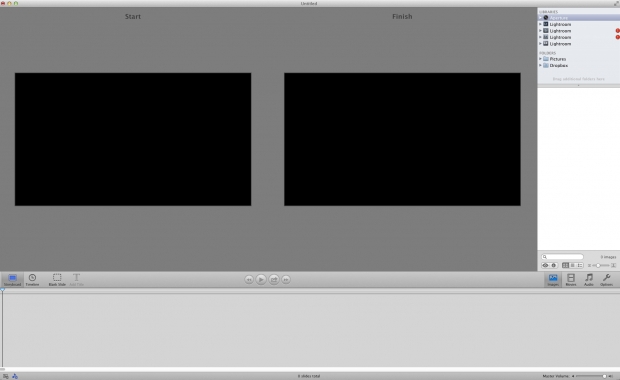
The main screen then opens up. There are 2 blank slides in the centre, representing the start and finish views of a slide. To the right we see our drive, and whatever libraries we have available. You can see that it's picked up some older Lightroom catalogs, as well as my current one.
It's probably best to have the images chosen in advance in Ligthroom, so I go straight to the Collection I want to create my slideshow from. By clicking the first image and using the generic shortcut Command A (Select All), I can then drag all the photos to the Storyboard. This gives a basic slideshow, not too disimilar to Lightroom's.

As well as the Storyboard, there's also a Timeline. This view gives a better look at transitions and durations, and is my preferred view. Underneath the images are 4 icons: Images, Movies, Audio and Options. By clicking Options, you get more control over the slides.
To change the duration of all slides, select all, and then drag the duration slider to suit. You can also choose to turn off slide animation for all slides, by unticking 'Animate'. If only one slide is selected, the settings apply to just that slide. Simple and straightforward, with no overthinking. As well as using Duration to change slides, you can also use Audio Markers, or Mouse Click. There's also a Notes section to allow you to add presenter notes. At any time, you can use the playback controls to see how the slideshow looks.
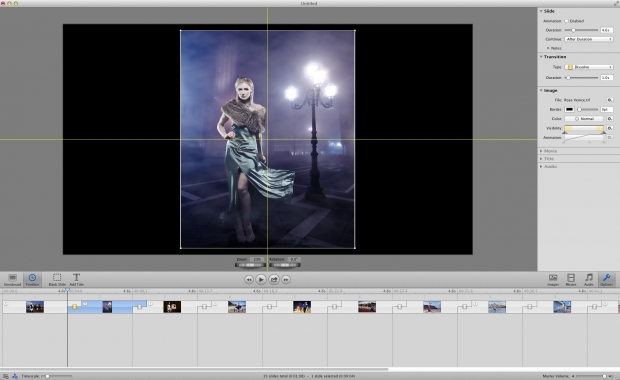
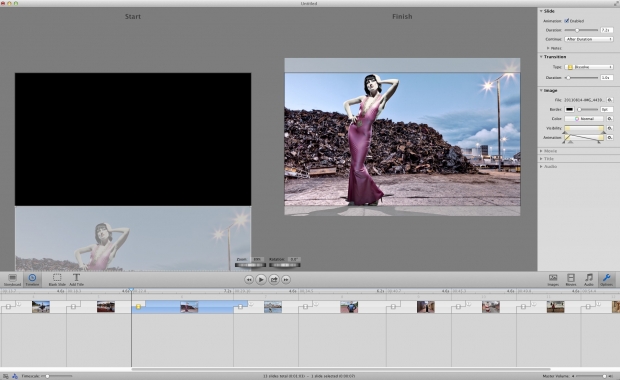
Each slide can be zoomed and rotated between the start and finish of it’s duration. Simply use the corresponding sliders. To position the slide, click and drag inside the frame. As you drag, you’ll notice there are guides to help you center the image, which is great. By running the slideshow as you work, it’s really easy to see how things are working.
We'll come back to the Transition options, but first let's look at the Image options for our animation. By default the animation runs for the duration of the slide, but by playing around with the 4 triangles, you can delay the animation, have it stop animating during the duration, and even control the speed of animation. Other options include Border color, a Color control which can tint and remove color, and Visibility- a more versatile Opacity control.
To access a Transition, click on the box in between 2 slides. From the Transitions Options, you can choose from a whole range of options.
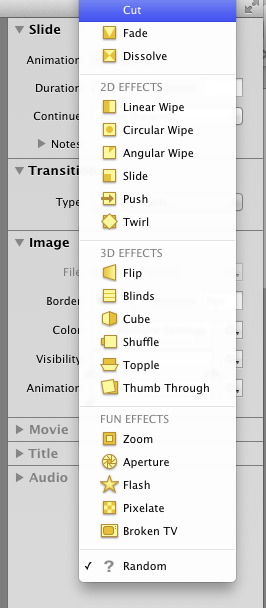
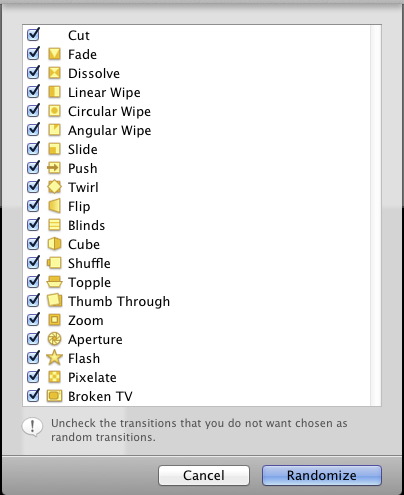
Clicking Random brings up a dialog box that allows you to exclude transitions, and will randomly insert a transition (best to have all images selected if you want it to be random for the whole slideshow).
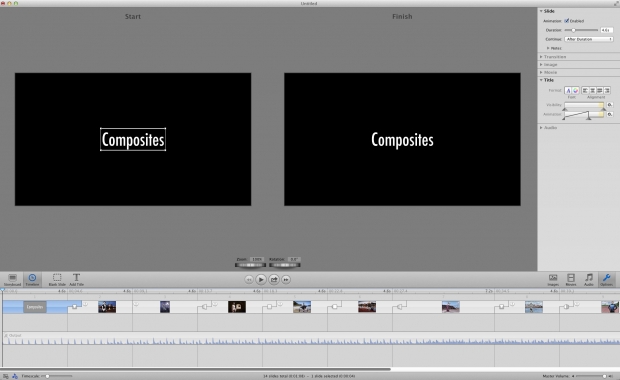
There's two more things I want to do. Create a title on a blank slide and add audio. At the first slide, click the 'Blank Slide' icon to insert a blank slide. Then click Add Title and enter your text. The Title options open automatically and you can change the colour, font, visibility and animation from there. Easy.
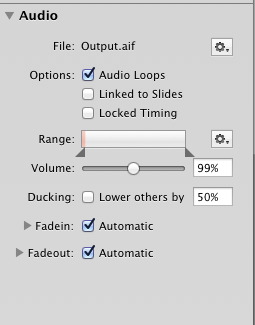
To add audio, click the Audio icon. Fotomagico will pull from iTunes and Garageband, as well as common music and sound effects folders. I listened through some old Garageband tunes to choose one. Do be aware that choosing commercial music could spell trouble down the line, so royaltly free music and music licensing sites like Audio Jungle could be a better option. Simply drag the audio to the timeline. With the waveform selected, I trimmed the song down to the last slide, and checked the Automatic box on Fadeout.
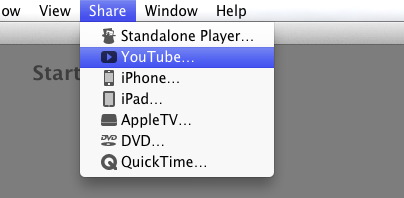
So that's my basic slideshow. To get it online, go to the Share menu and choose a suitable option. To embed into this post, I'm going to opt for YouTube. It's simply a matter of entering login details and information about the slideshow, and then letting Fotomagico render and upload the video.

While I've been a bit whacky with the zooming etc, you can see you've a fair bit of versatility with it, and with transitions. There's far more features than I've covered. For instance you can add movie clips to the slideshow, as well as more than one audio track. Great for mixing narrative and music. You can have more than one image in a slide, and even have one image fixed while the other animates. I haven't even touched on using audio markers to have images change on the beat of the song, or Chapters, etc.
Fotomagico is really straightforward to use, I didn't need to look at the manual to find out anything specific to get it all going. Obviously I'm computer literate, but there certainly wasn't anything taxing about creating the slideshow. As to going further and getting to the amazing stuff that's visible in the demo slideshow, that'll take more than I've covered in a simple review. That's the beauty of it. A few minutes will create a quick slideshow, while spending more time will allow the creation of something far more epic. If you're truly looking for something that gives fantastic control over your slideshows, I've no hesitation in recommending Fotomagico 4.