
Prior to having the ability to shoot tethered directly in Lightroom, the only option was to use the Auto Import function. It was also useful before we got the Add to Catalog option in Export. The feature has seen no changes since it was implemented, even though the Import Dialog completely changed with Lightroom 3.0. So is the feature still worthy of our attention? Of course it is.
While Lightroom did get direct tethering as a modal dialog box (i.e. it floats above the main window and can be moved about-the only tool that does this), it’s limited to Nikon and Canon cameras. Hopefully Adobe will either extend this, or at least open it to 3rd party developers. Even at this, the camera list is not the same for Mac and PC. Not only that but, it only controls the shutter button on the camera. If you want to control the camera fully from your computer, you’ll need either the manufacturers software (Canon EOS Ulitity or Nikon Camera Control Pro, for example) or a third party software like Sofortbild.
These bring the files onto the computer into a specified folder. So for Lightroom to access these files, the folder must be ‘watched’ by Lightroom somehow. And that’s where Auto Import comes in.
Auto Import essentially lets you choose one folder to ‘Watch’. This folder must be empty, or Auto Import will simply fail. Once a file is found in the folder, Lightroom moves the file to a destination folder, emptying the watch folder in the process. It can rename the file, add metadata, develop settings and keywords as it does so. One thing that is a major difference from the Import menu is that it cannot automatically create a date structured hierarchy. Files go to the one folder that’s selected as the Destination folder.
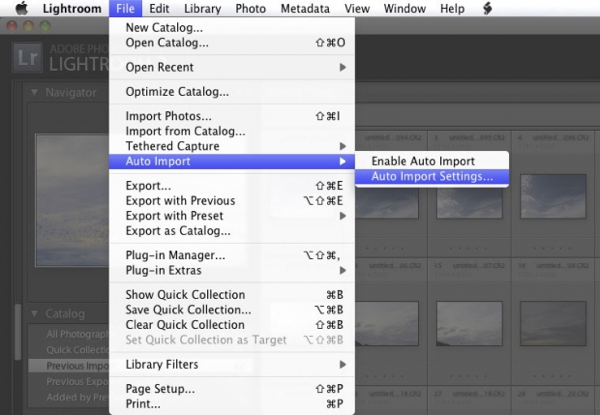
So how do we set this up? Well, before we can check the ‘Enable Auto Import’ menu item (in the File Menu>Auto Import), we must choose our Auto Import Settings. Click these in File>Auto Import>Auto Import Settings.
When the dialog box opens, here’s how to set them up. When done, click the ‘Enable Auto Import’ checkbox. This can also be turned on and off in the Auto Import menu, once the settings are made.
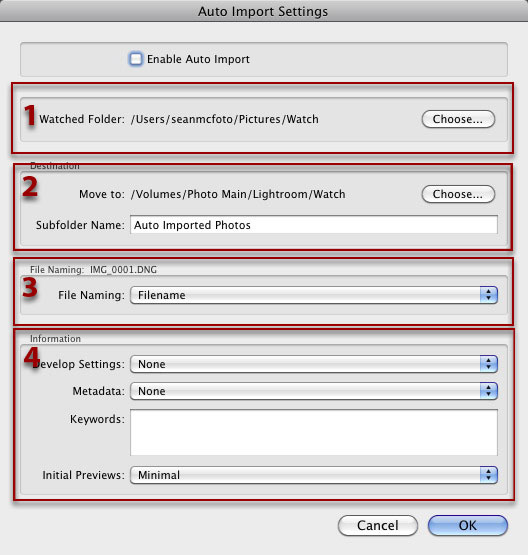
1. Set the name of the folder you want Lightroom to watch. If you’re using a tether folder from other software, make sure these match and that the folder is empty before you begin Auto Import.
2. Set the destination folder. This is the folder Lightroom moves the files to after they’ve been detected in the Watch folder.
3. Optionally rename the file using the standard File Naming templates for Lightroom.
4. Add Develop settings, Metadata Presets or Keywords, along with selecting the preview size for Lightroom, once imported.
That’s pretty much it for getting started. Simply start firing the camera and Lightroom should start moving them. It takes about 5-6 for large Raw files to come across. You could also test by dragging images into the folder when Auto Import is set up and enabled.
If you have a folder that’s already in Lightroom, you can drop new files into that folder and use the Synchronise Folder command to import into Lightroom, rather than trying Auto Import or Import.


