Despite the long intro in this article, I’m actually gonna talk about a neat plugin for matching your hard drive layout externally to the catalog.
As a photographer that also does a lot of writing, for me the key to any article is the right photo. For magazines like Photoshop User, or Digital Camera World, the text is based on the work done on the photo. That makes it essential that I have access to all my photos so I can get the right one at the right time.
Of late I’ve been doing this from home, so the only issue is turning on my external drives to access them. The problem with working from home is that I’m easily distracted so get way less done. There’d be a lot more blog posts if I was working from the studio for example. So why not just work from the studio?
Well, there’s 3 reasons. One is the computer there is even older than the one at home. The 2007 iMac 2.4 Ghz Core 2 Duo with 4Gb Ram in the studio is fine for music and internet, but not great for anything processor intensive. The second reason is Internet. As a catch 22, I’m not there because the only internet is by tethering to my phone-and I won’t get a better (far more expensive) connection because I’m not there enough. The final reason is the one I’m tackling here with this article. My photos live on 3 internal drives and 1 external drive on my MacPro. There are various backup drives scattered about unconnected, but for the most part, the work is done from these drives.
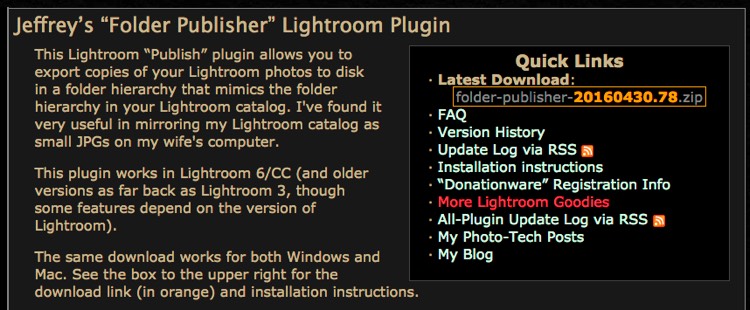
Because some of them are internal (for speed really), I can’t bring them to the studio. Next week, I’m getting a better iMac (not a new one) for the studio, which solves the computer issue for writing. The internet situation will continue as is until I absolutely can’t deal with it. Fellow Lightroom expert Piet Van den Eynde‘s solution is to keep the catalog with Smart Previews on a portable SSD, which is a great idea. As someone that likes to drop stuff and lose other stuff, I couldn’t trust myself with something that small. Besides, Smart Previews are only 2560px long, and I’d prefer the full size for publishing. For me the access to images is getting solved (I hope!) through a Publish Services Plugin called “Folder Publisher” from the king of Lightroom Plugins, Jeffrey Friedl.
Folder Publisher is installed via the Plug-in Manager in the File menu. It can also be invoked from the Export Dialog. It’s a matter of going to Jeffreys Blog and grabbing a copy. The product is free essentially, but requires registration, which is done with a 1¢ payment via Paypal. You can of course pay more if it’s useful to you.

Part of Jeffreys motivation for creating this plug-in was to generate a small JPEG copy of his library for his wife computer. Having a matching hierarchy makes finding the original image easier in the main catalog. My hope is that I can do the same but using Lossy DNG copies of my photos.
Lossy DNG’s are JPEG sized images that retain Raw controls like White Balance and highlight recovery. They’re created using JPEG compression, but use a gamma encoding that’s based on the original image curve, rather than a fixed gamma (like sRGB). This gives far more editing that can be done with a JPEG. Yes, the original image has been through a demosaic process, so it’s not a full Raw. It’s more akin to an mRaw or an sRaw file in camera. There isn’t quite as much leeway in editing as a full Raw either, but it’s enough for access for writing.
Folder Publisher is straight forward to setup. For the most part it’s similar to the Export Dialog, but there are more features. Thanks to SnagIt’s scroll feature, I can show the whole settings page, but I’ll leave it below the text for ease. The main things to note are that I’ve chosen a folder as the publish root-once my testing is done, I’ll be changing it to a portable drive. This will probably force a republish of everything, but that’s ok. (Update: the process moves the files for you, so you don’t need to republish). I’ve also set the files to be exported as Lossy DNG. The rest of the panels are features of the plugin. You can use a better renaming panel, change what metadata is added, opt to use Smart Previews if the main file is missing, set up FTP to upload the published files or even export the settings to use with the plugin on another computer. When you’re done with settings, press Save.
It couldn’t be simpler to use. Just drag the file you want to the ‘Photos to Include’ Publish stream and hit the Publish Button at the bottom of the Left Panel with the stream selected.

One thing to note is that rendered files like JPEG, TIFF or PSD also get converted. For the layered files, this means a flattened version. For what I need, this is fine. I can always go back to the original. Obviously these files don’t have the same editing leeway as a DNG converted from Raw.
Update: With everything tested and working, I’m creating Smart Collections inside the Publish Service, set by Year. This means I can add a year at a time, and also means that new photos will get added each time I publish to the service.


I wonder whether this might be a useful tool for creating files for cloud backup. If all else crashes, maybe “good enough” will be better than nothing.